How to Use Members
Invite people to your organization, assign roles and projects, and manage pay rates, timesheet access, and tracking permissions.
Open Members
Go to Members
Click Members under Admin in the left sidebar. Three tabs organize the page:
Active
Current members with roles, projects, pay settings, and timesheet toggles.
Invited
Pending email invitations — resend or cancel.
Join Requests
People who requested to join with your organization code — approve or decline.
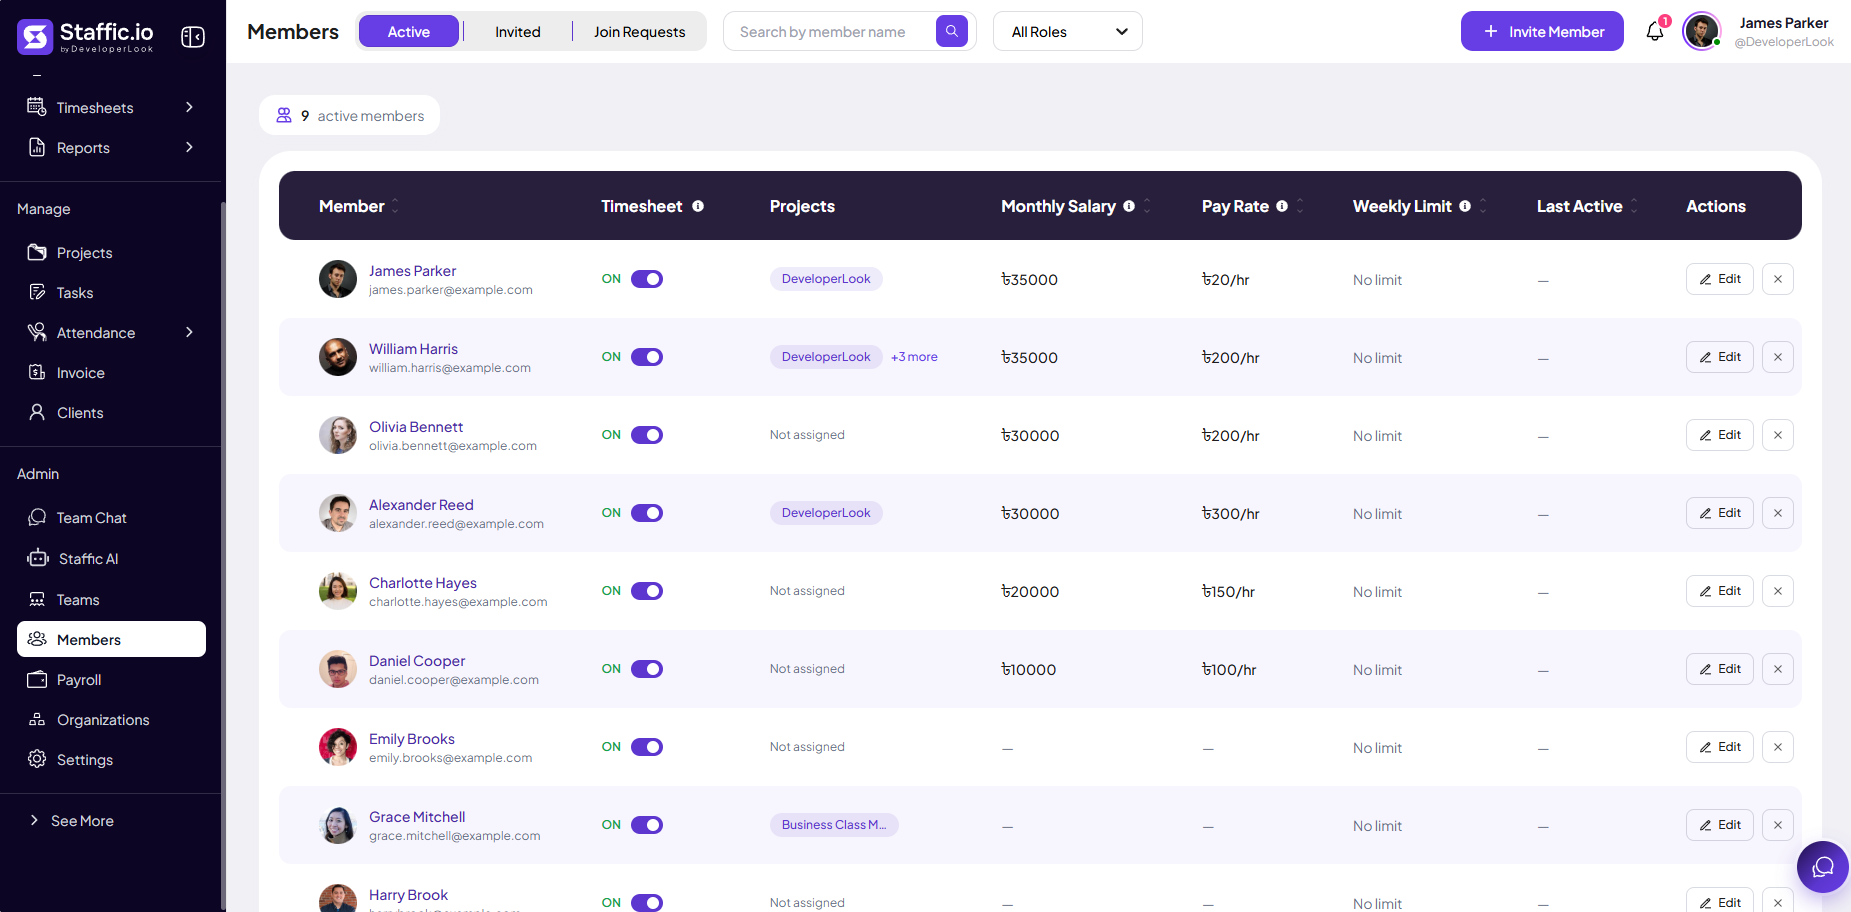
Active members
Member list
The Active tab shows how many members are active (for example, 9 active members). Search by name, filter by All Roles, and click + Invite Member to add someone new.
Member
Avatar, name, and email.
Timesheet
ON/OFF toggle — disable when someone should not log or submit time.
Projects
Assigned project badges or Not assigned — controls what they can track.
Monthly Salary & Pay Rate
Used by Payroll and margin reporting — set per member.
Weekly Limit
Cap on hours per week where configured, or No limit.
Actions
Edit (pencil) opens profile, permissions, and rates; X removes or deactivates where allowed.
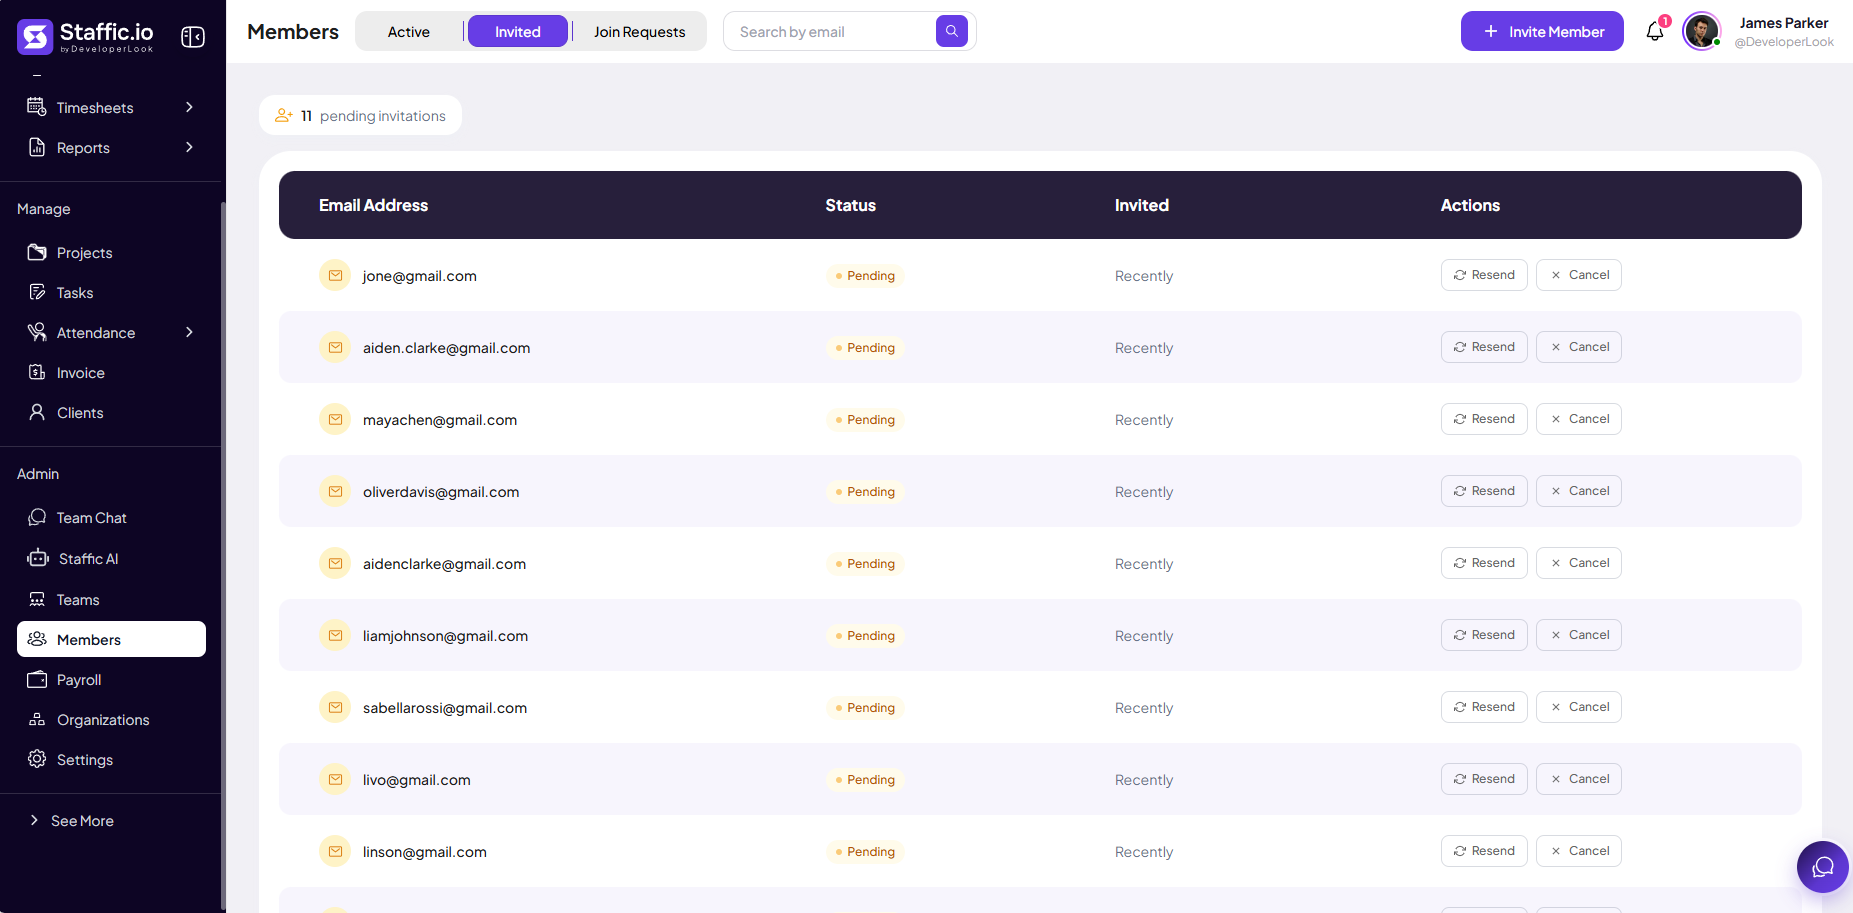
Invited members
Pending invitations
Open the Invited tab to see pending invitations (for example, 11 pending invitations). Search by email.
Email Address
Address the invite was sent to.
Status
Pending until the person accepts and completes signup.
Invited
When the invite was sent (for example, Recently).
Resend
Send the email again if it expired or was missed.
Cancel
Revoke the invitation before they join.
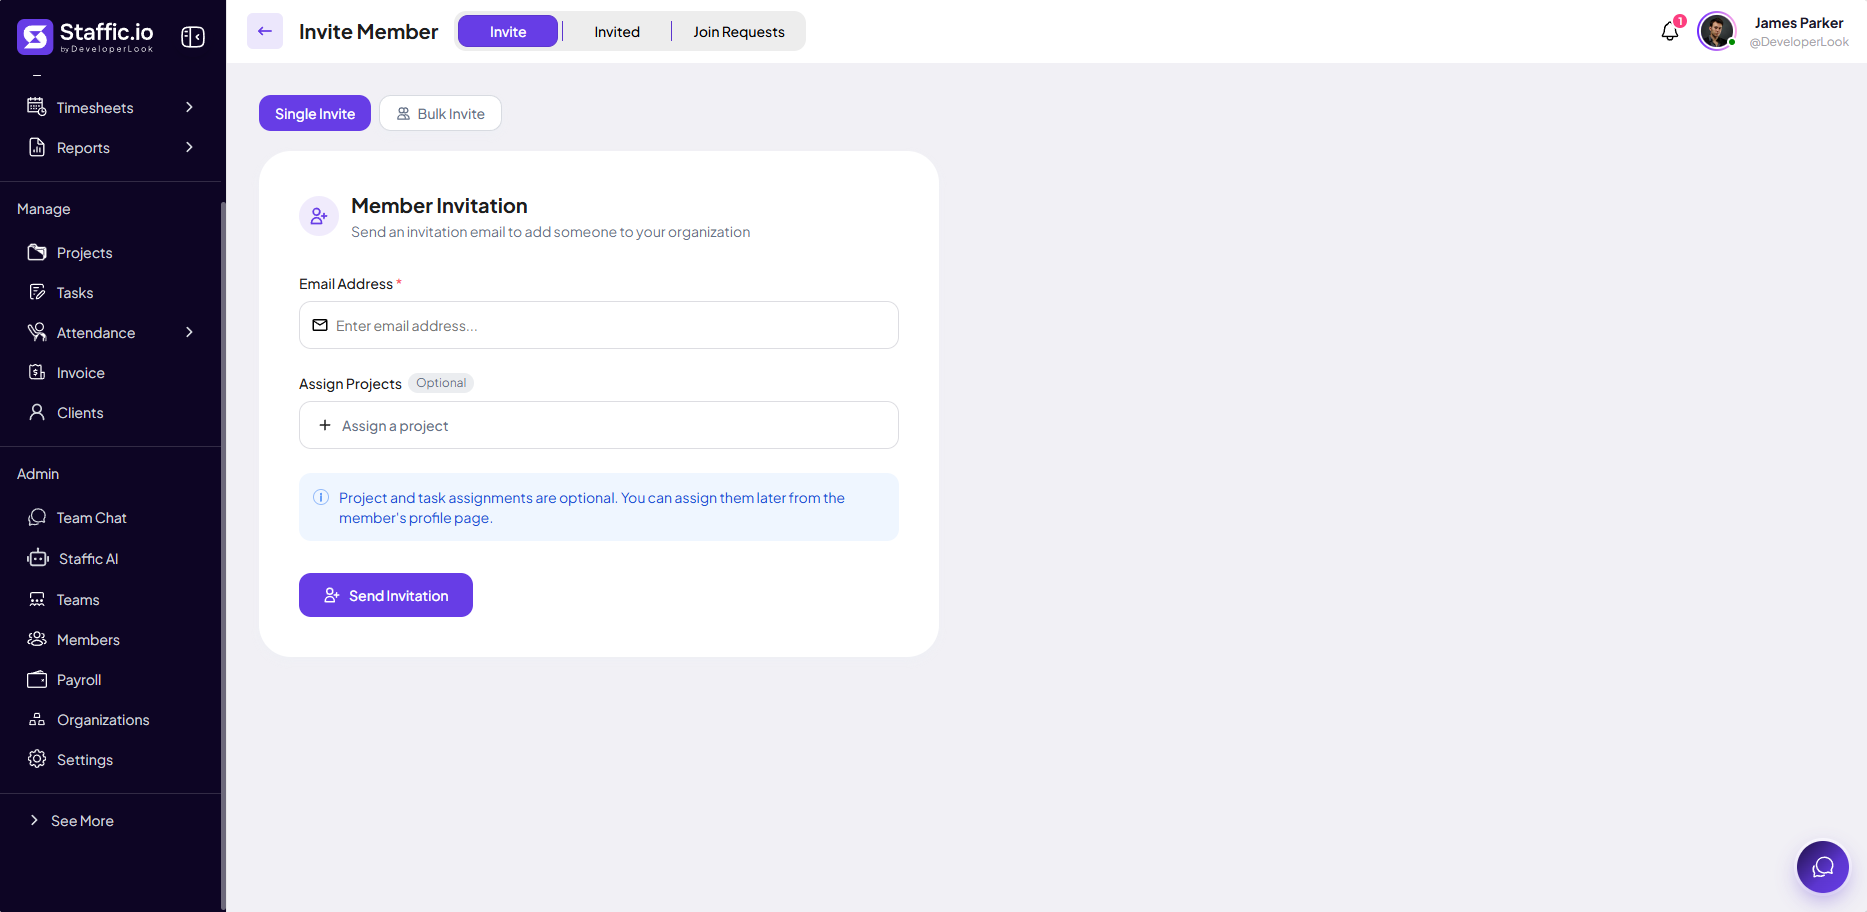
Invite a member
Single or bulk invite
Click + Invite Member. Choose Single Invite for one email or Bulk Invite for many at once.
Email Address (required)
Work email — Staffic sends the signup link.
Assign Projects (optional)
Pre-assign projects so the member can track immediately after joining.
Send Invitation
Dispatches the email — the invite appears under Invited until accepted.
Project and task assignments are optional at invite time — you can assign later from Edit on the Active tab.
After they join
Set role, pay rate, screenshot permissions, and manual-time rules in Edit. Add them to Teams for scoped manager access.
Tips
- Invite a pilot group before rolling out company-wide.
- Deactivate instead of delete when someone offboards — history stays in Reports and Timesheets.
- Turn Timesheet OFF for contractors or viewers who should not log hours.
- Resend invites that sit in Pending for more than a few days.
Ready to get started?
Create your organization, invite your team, and start tracking in minutes.
Start Free Trial