How to Use Settings
AdminConfigure tracking, timesheets, roles, billing, and invoice defaults for your organization — changes apply workspace-wide unless overridden per member (admin only).
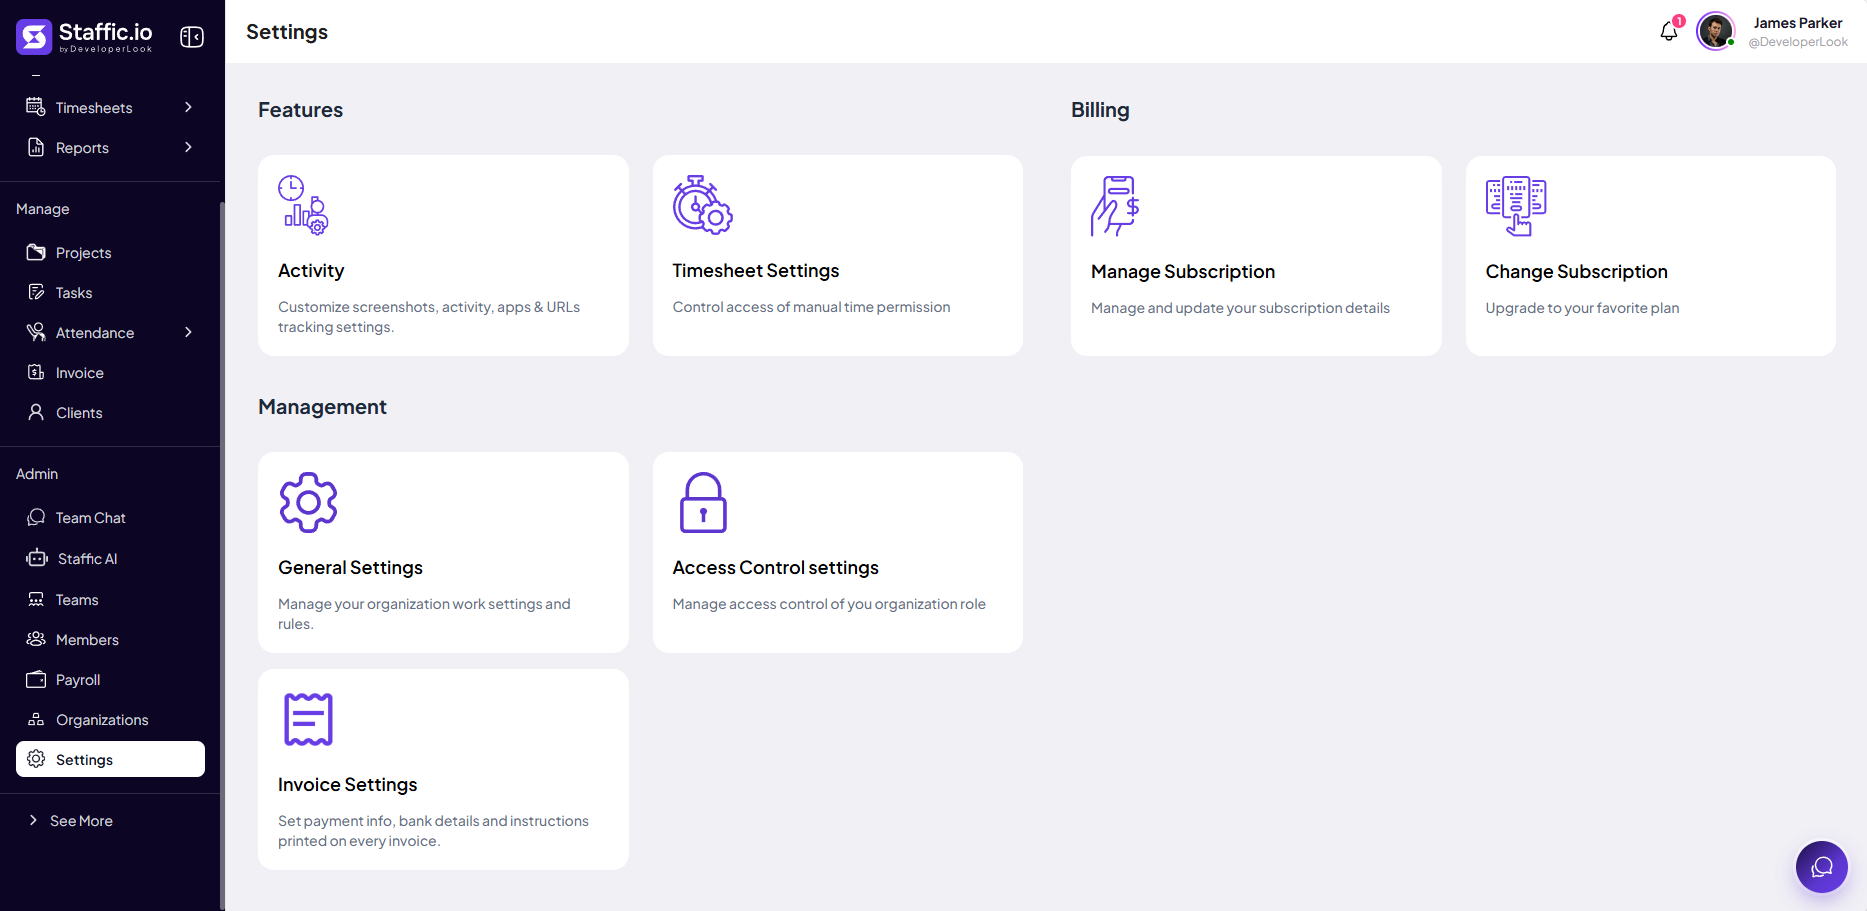
Settings hub
Open Settings
Click Settings under Admin. Cards group options into Features, Billing, and Management.
Activity
Screenshots, apps, URLs, keystroke tracking, and per-member overrides.
Timesheet Settings
Manual time permission and timesheet approval toggles.
Manage Subscription / Change Subscription
View plan details or upgrade.
General Settings
Work hours, weekends, leave limits, tokens for Staffic AI.
Access Control settings
Role-based module permissions.
Invoice Settings
Organization address and bank details on invoices.
Activity Settings
Organization tracking rules
Under Activity, set defaults for the whole organization:
Screenshot Tracking
Master ON/OFF for interval screenshots during tracked time.
Screenshot Frequency
1, 2, or 3 shots per 10 minutes (for example, 12 screenshots/hour at 2 shots).
Delete Screenshots
Allow or block members from deleting captures.
Instant screenshot permission
Let members accept or deny Live Feed screenshot requests.
Application & URL Tracking
Control apps and browsing history collection.
Keystroke And Mouse Track
Activity signals for engagement scores.
Meeting Idle Time Track
Track idle time during meetings per policy.
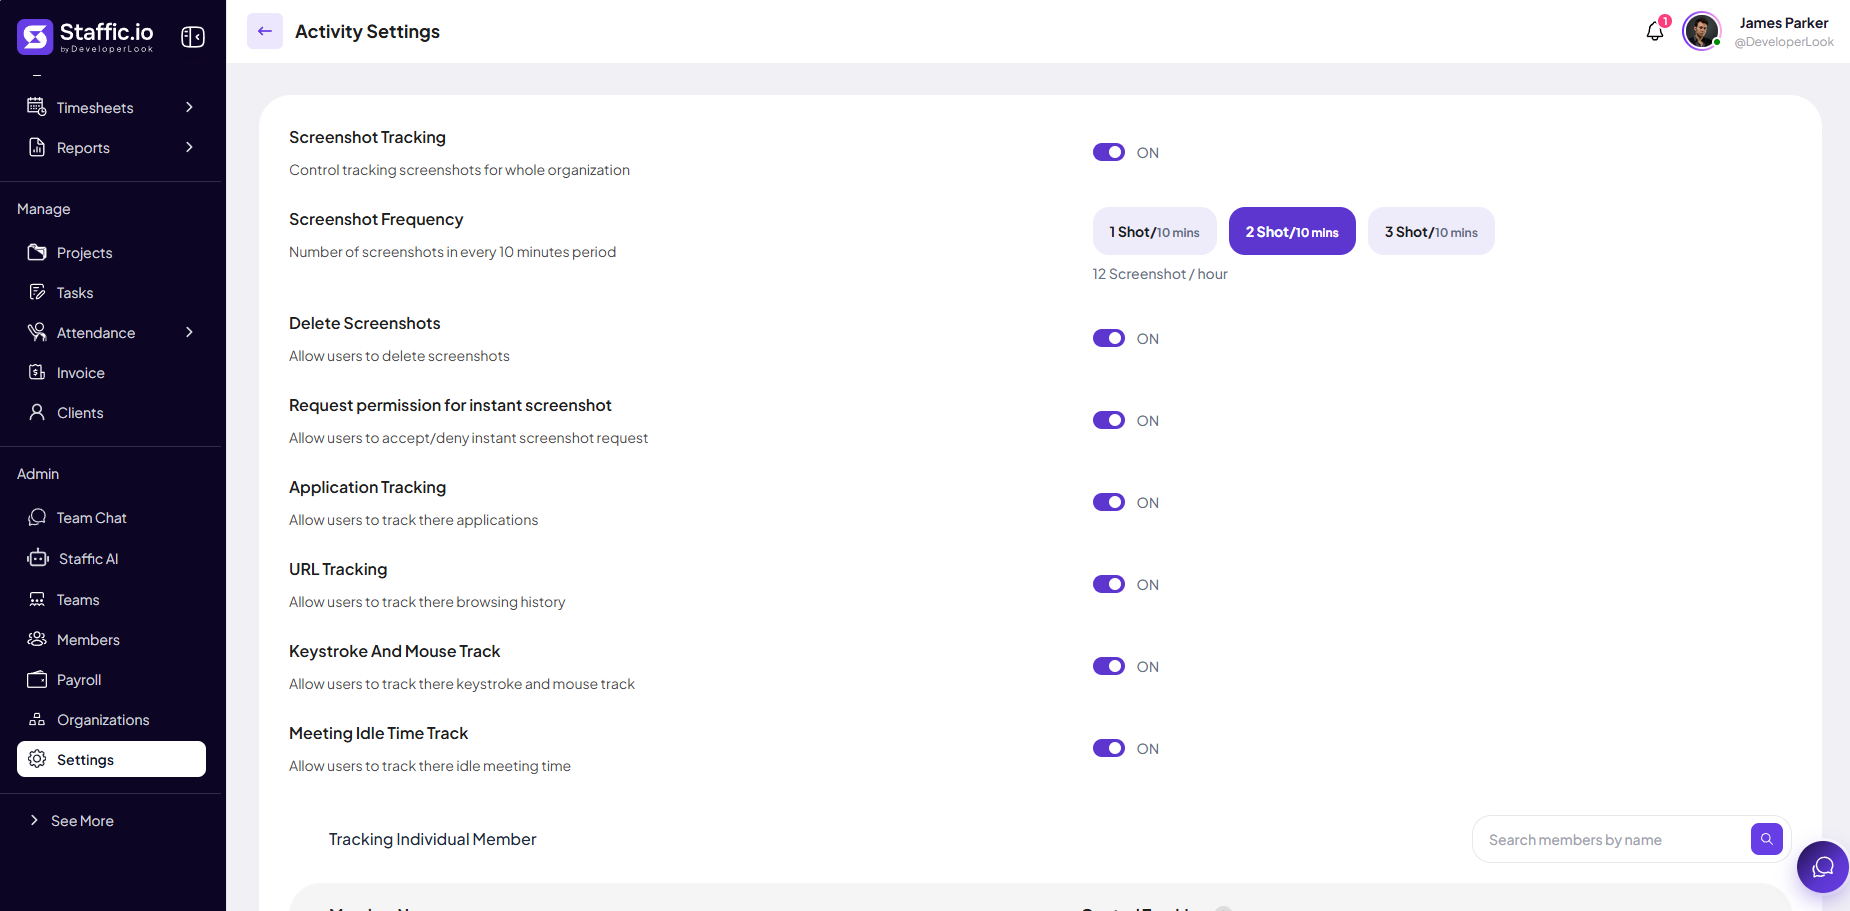
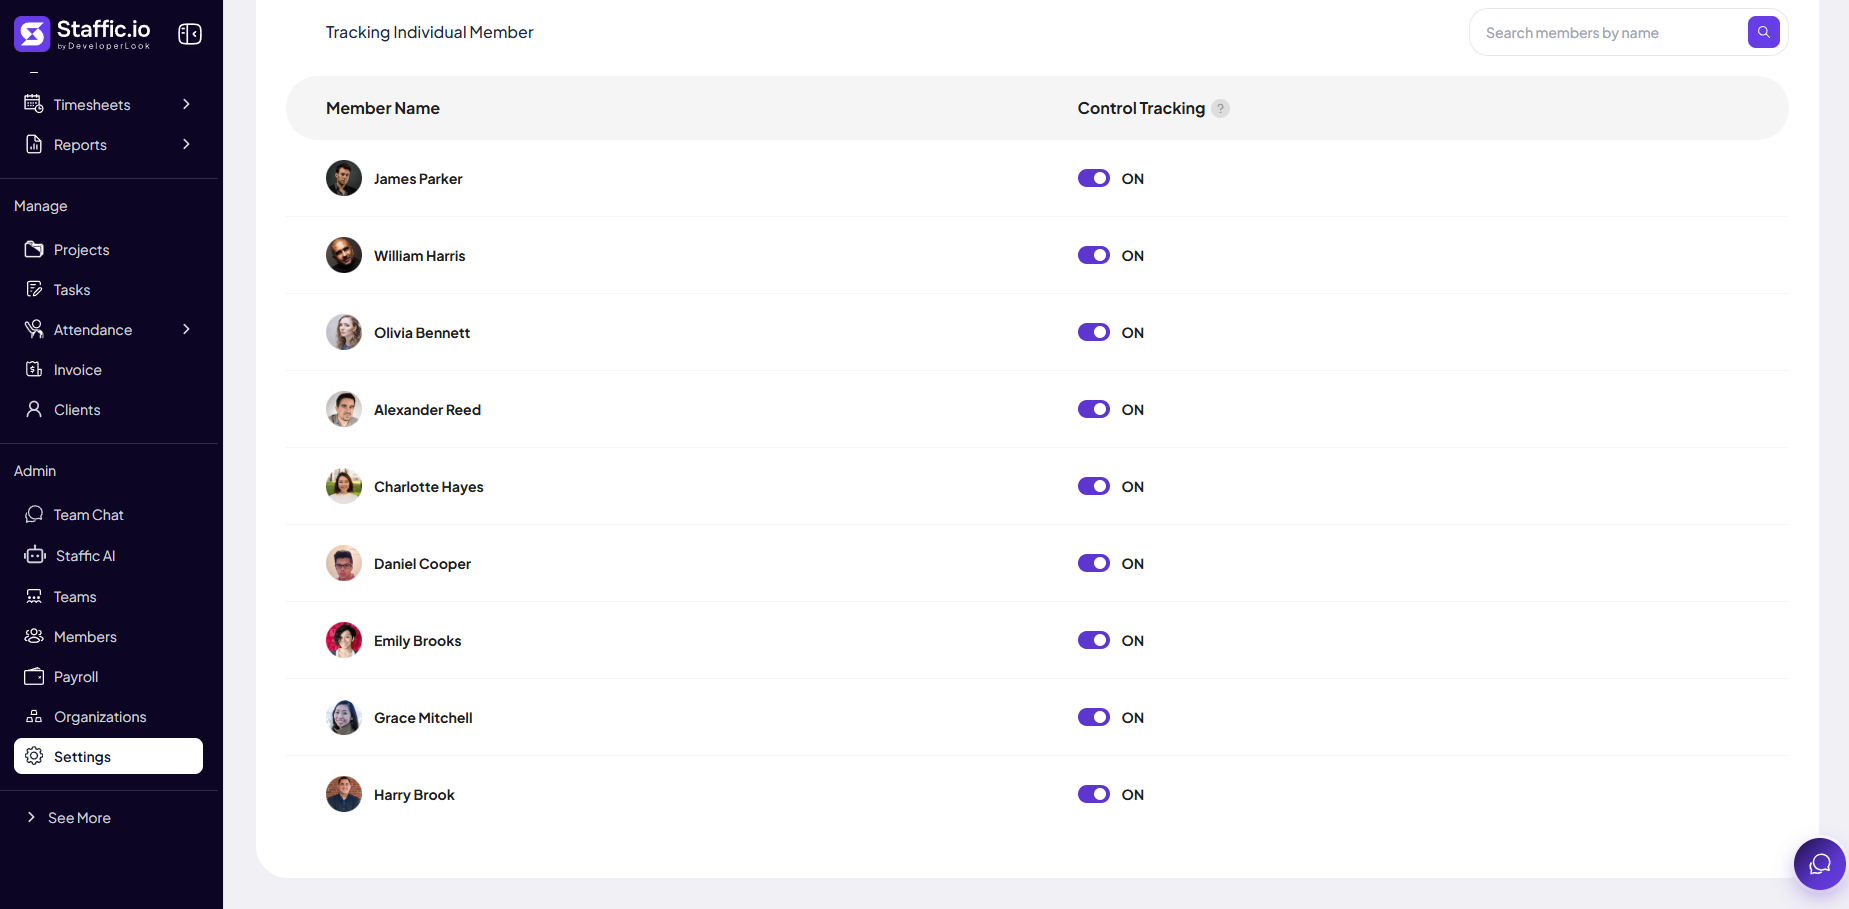
Tracking Individual Member
Scroll to Tracking Individual Member to override tracking ON/OFF per person — search by name.
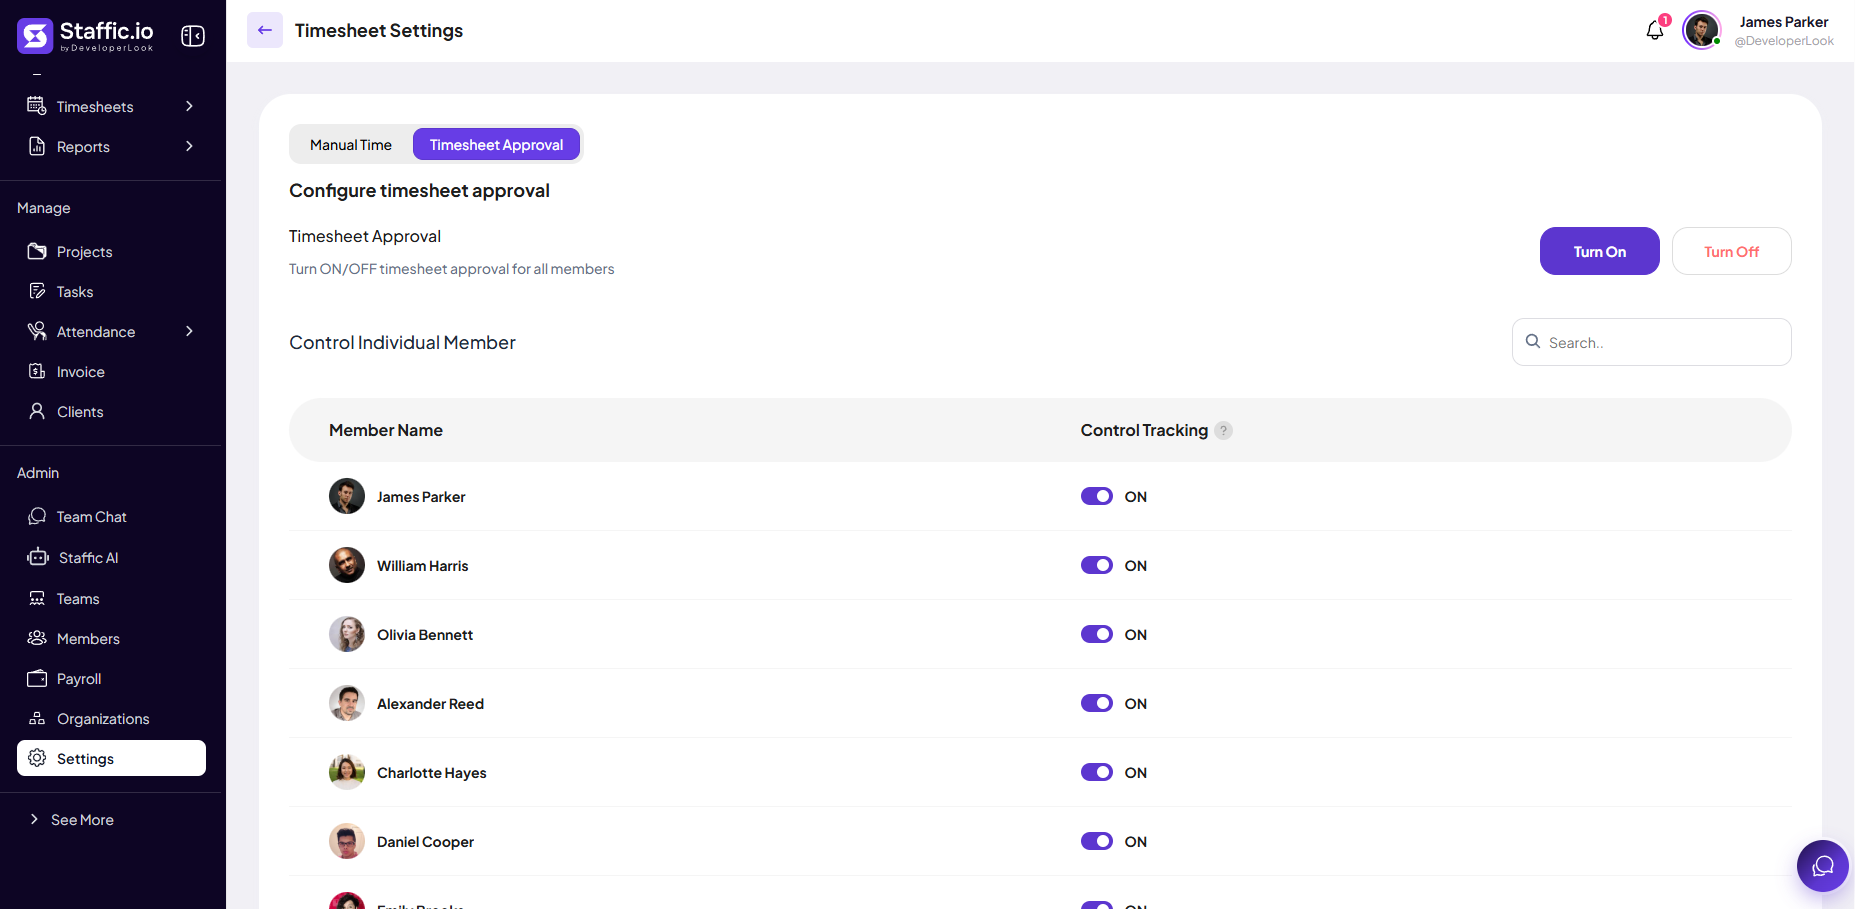
Timesheet Settings
Manual Time tab
Open Timesheet Settings → Manual Time. Toggle Allow members to add manual time ON or OFF organization-wide.

Timesheet Approval tab
On Timesheet Approval, use Turn On / Turn Off for all members, then set per-member toggles under Control Individual Member.
Timesheet Approval requires an eligible plan — see Pricing. Pair with Timesheets → Approval in the docs.
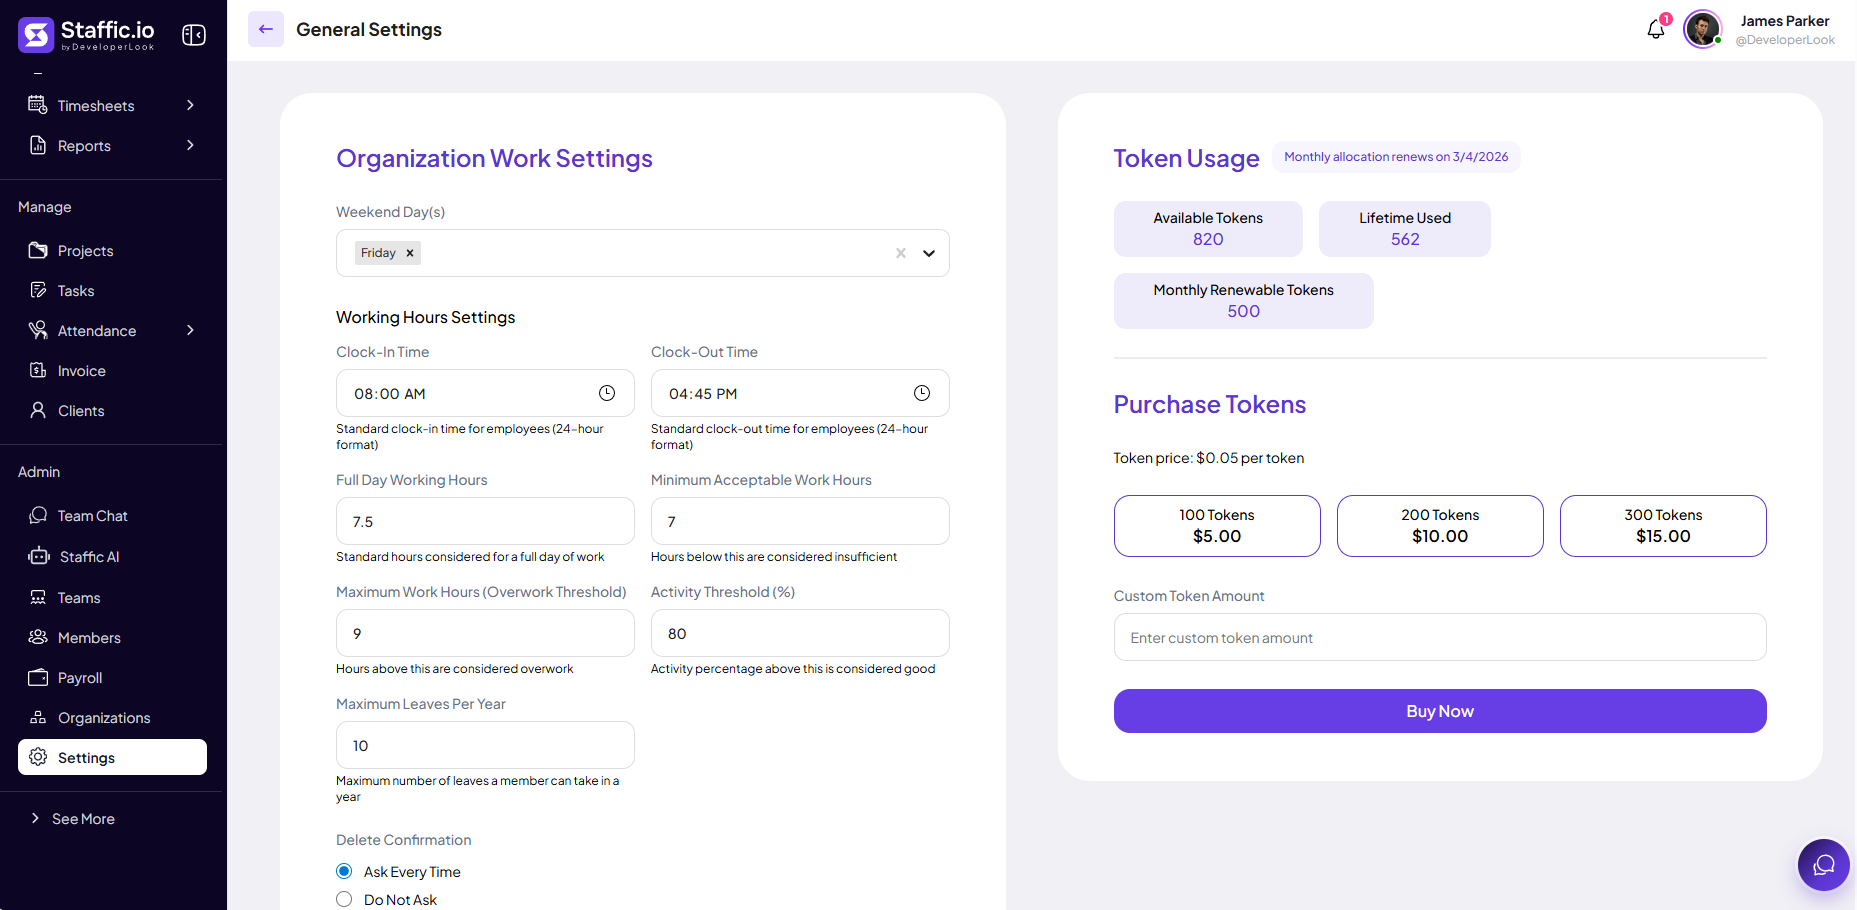
General Settings
Work rules and tokens
Under General Settings, configure organization work rules and Staffic AI tokens.
Weekend Day(s)
Which days count as weekend (for example, Friday).
Clock-In / Clock-Out Time
Expected shift boundaries for attendance.
Full Day / Minimum / Maximum Work Hours
Targets and overwork threshold for reporting.
Activity Threshold (%)
Engagement benchmark used in analytics.
Maximum Leaves Per Year
Cap aligned with Leave Manage.
Token Management
Available, lifetime used, and monthly renewable tokens — purchase more for Staffic AI.
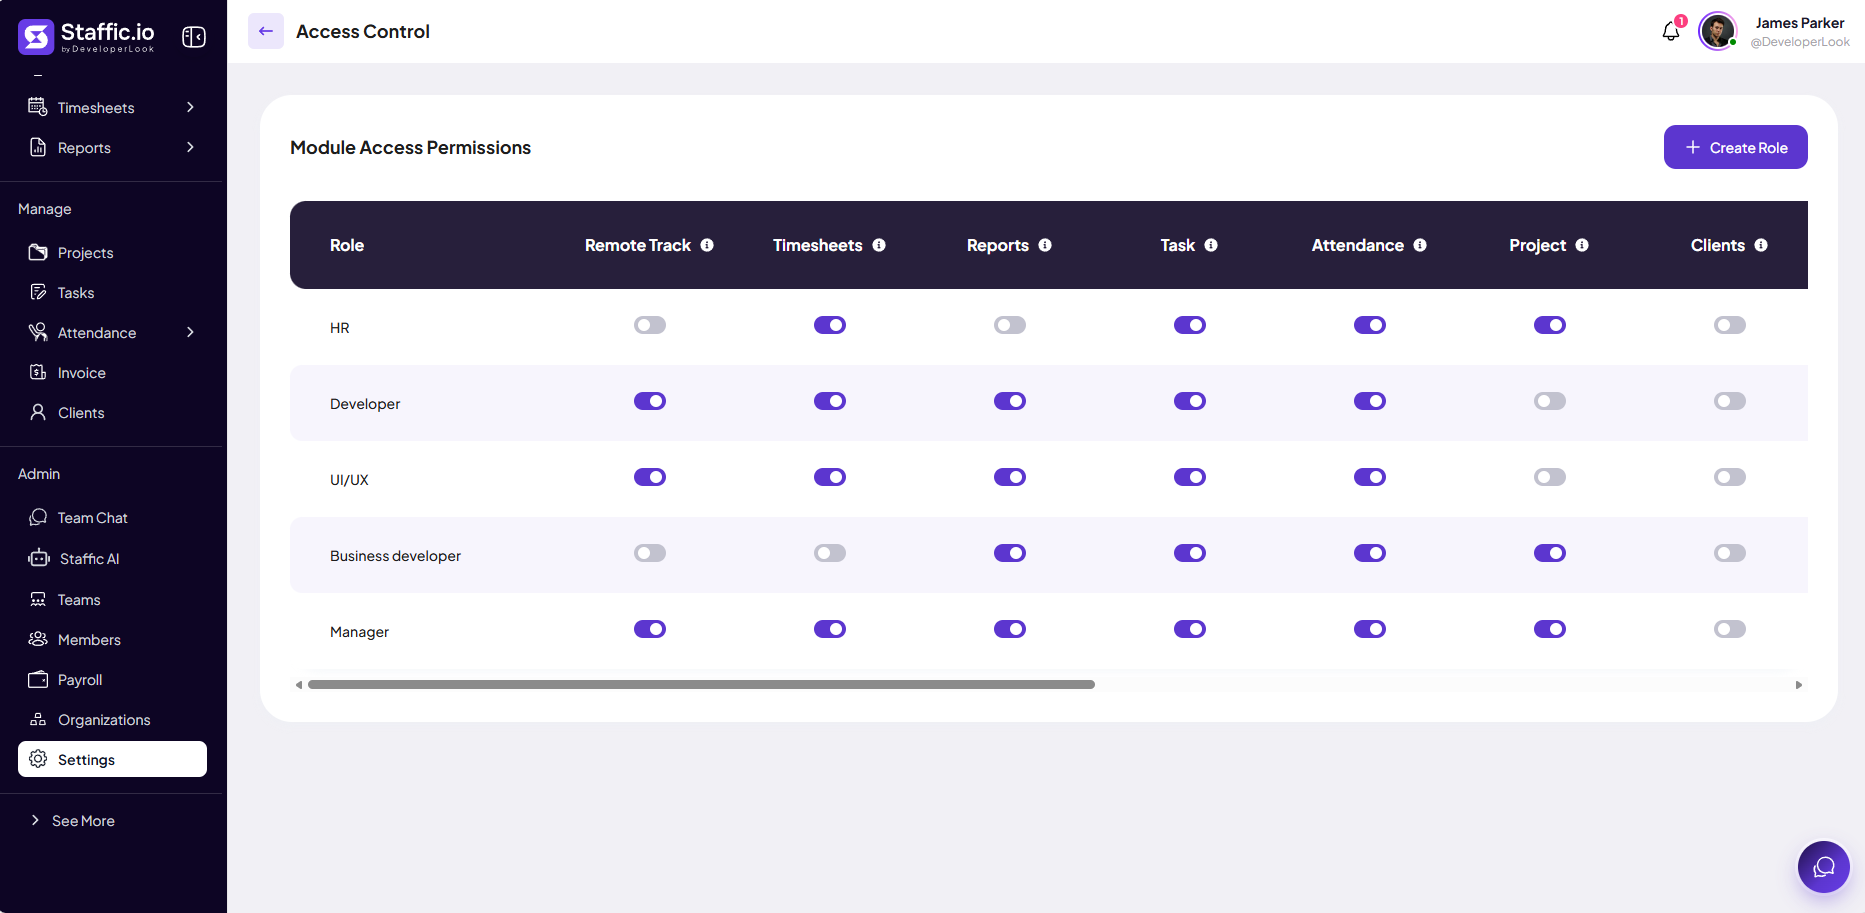
Access Control
Module permissions by role
Open Access Control settings. Click + Create Role, then toggle access per module:
Remote Track
Screenshots, apps, URLs sub-pages.
Timesheets & Reports
Time entry views and analytics exports.
Task, Attendance, Project, Clients
Manage-section modules — restrict by role (for example, Developer vs HR).
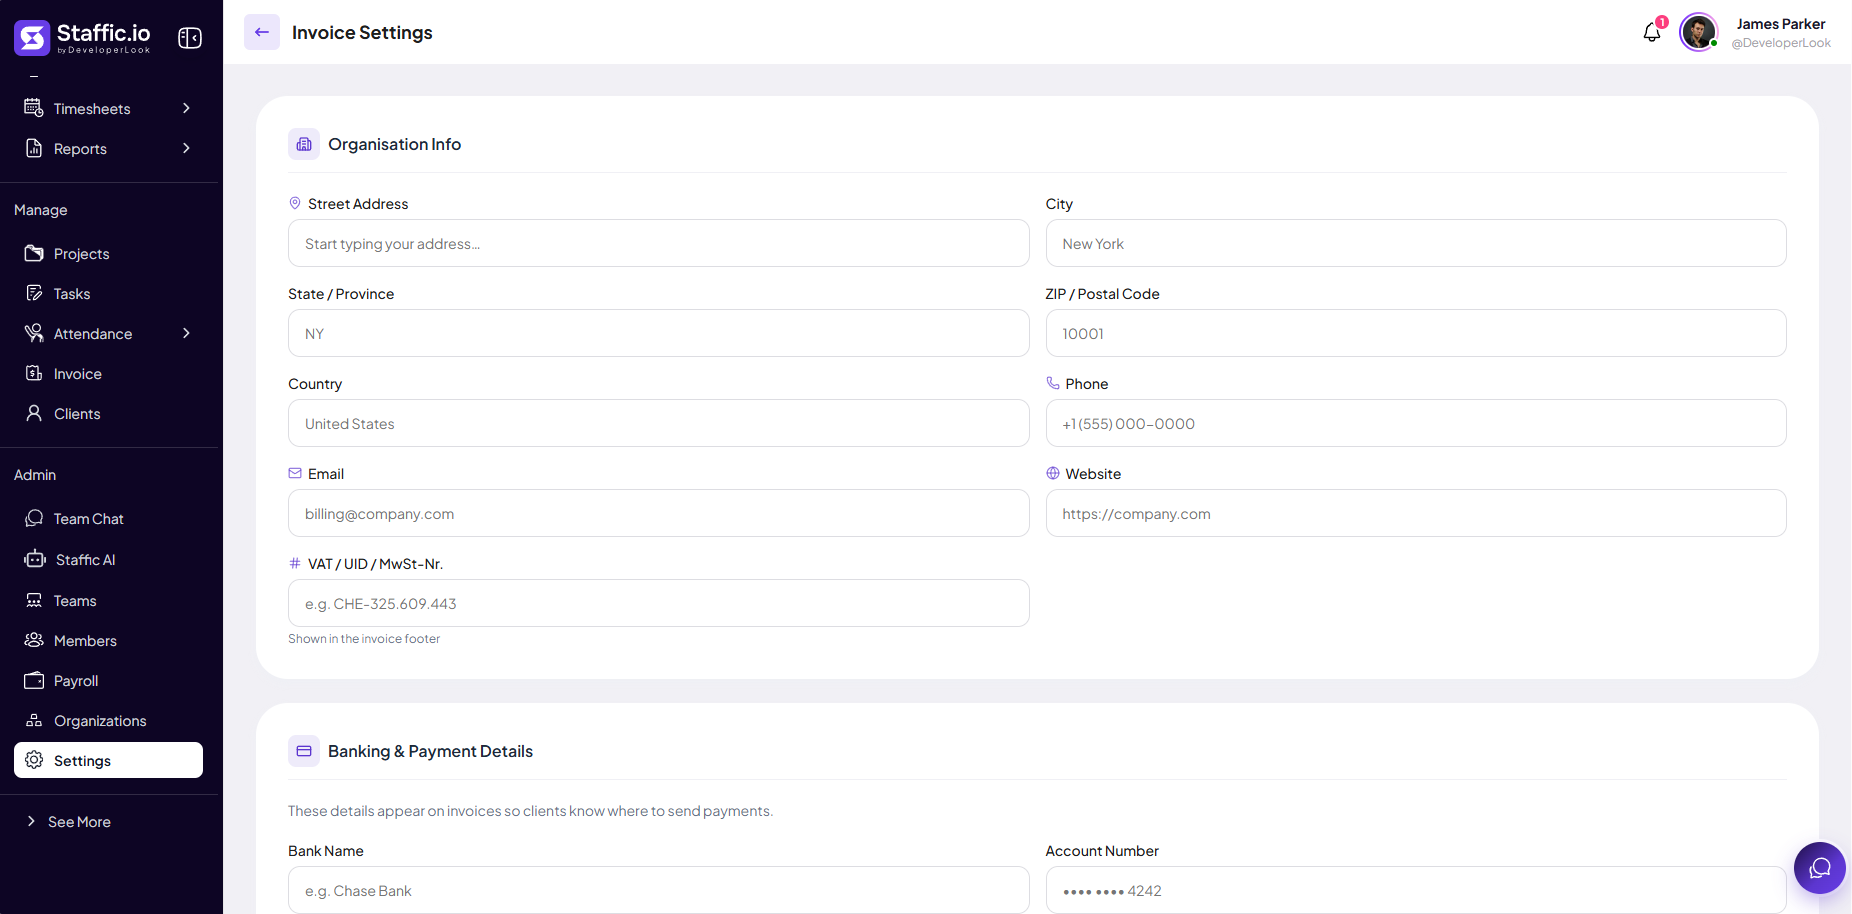
Invoice Settings
Organisation and bank info
Under Invoice Settings, set details printed on every invoice:
Organisation Info
Street, city, state, ZIP, country, phone, email, website, VAT/UID — footer on PDFs.
Banking & Payment Details
Bank name and account number so clients know where to pay.
Create invoices under Manage → Invoice after these fields are complete.
Tips
- Document policy changes and notify the team before turning on screenshots or URL tracking.
- Use Activity → Tracking Individual Member for contractors who should not be monitored.
- Review Settings after every plan upgrade for new toggles.
- Set Invoice Settings before sending your first client bill.
Ready to get started?
Create your organization, invite your team, and start tracking in minutes.
Start Free Trial