How to Use Screenshots
Browse interval-based screen captures taken while members track time — filter by member, project, task, and date range.
Open Screenshots
Step 1: Open the Screenshots page
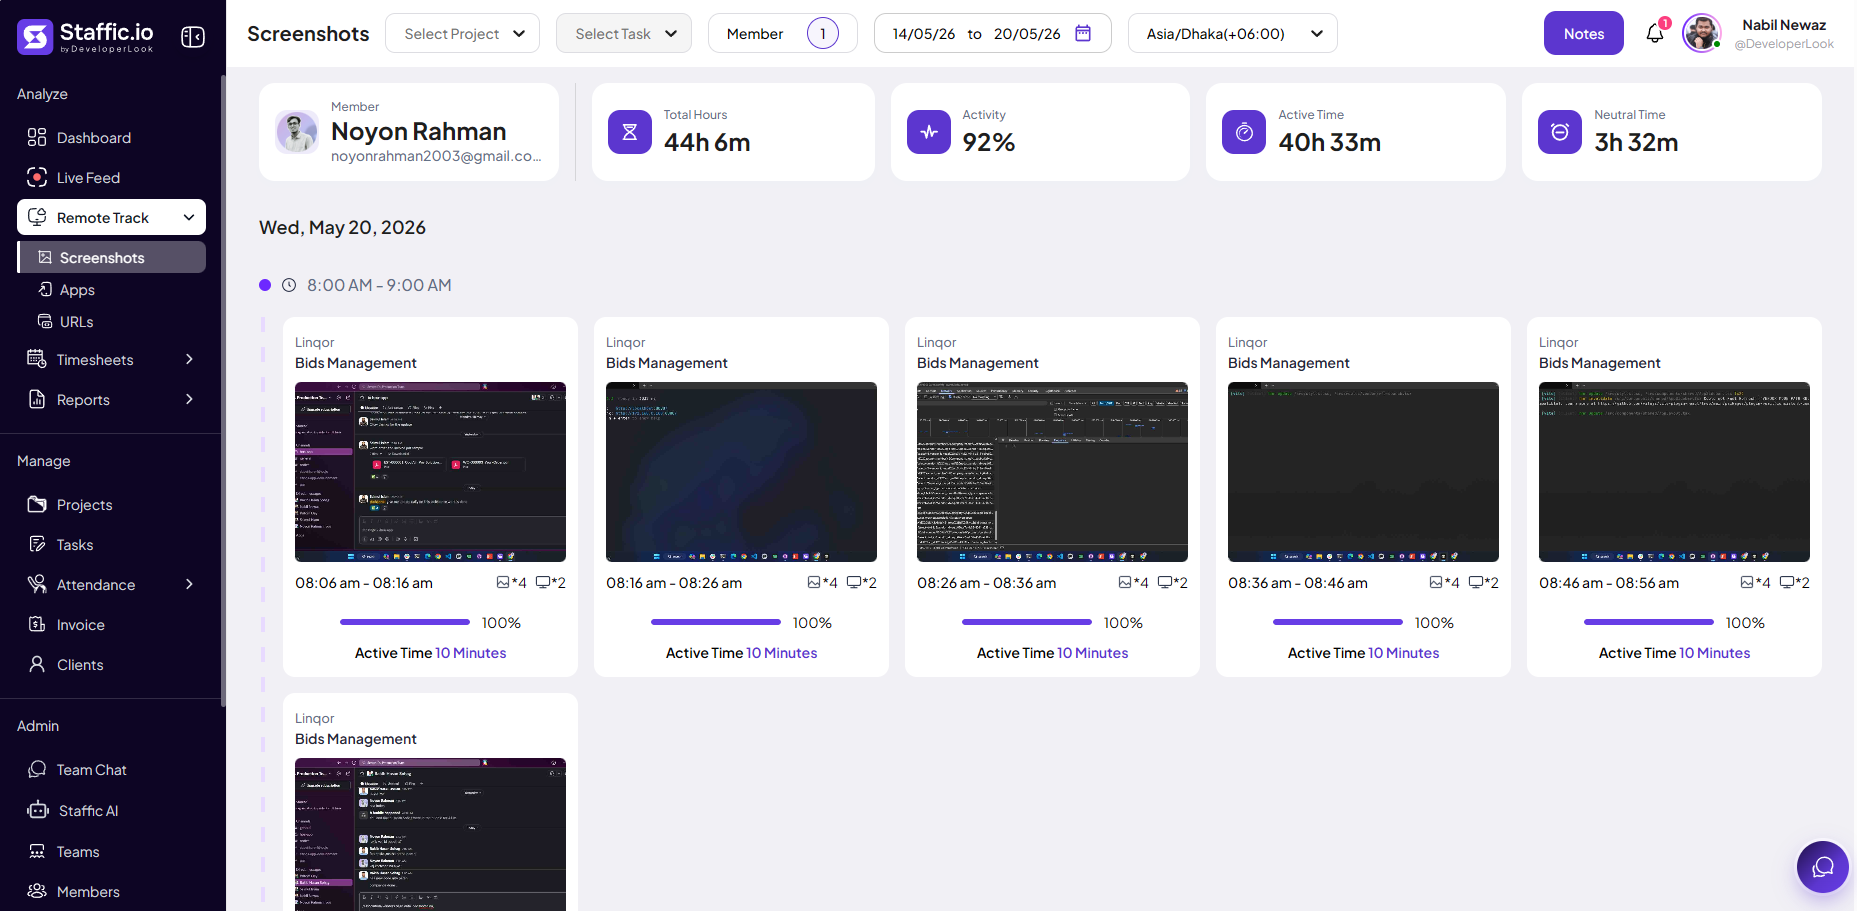
Sign in at app.staffic.io, then go to Remote Track → Screenshots under Analyze in the left sidebar.
Screenshots appear only when capture is enabled in Settings and the member has been actively tracking with the desktop app. This page shows scheduled interval captures — not Live Feed instant screenshots.
Filter & Select a Member
Use the top filters
Narrow results before reviewing captures:
Select Project
Show screenshots only for time logged to a specific project.
Select Task
Further filter to one task within the selected project.
Member
Choose whose screenshots to review. Managers and admins can switch between team members; members typically see only their own.
Date range
Pick start and end dates (for example, a full week) to load captures for that period.
Timezone
Displays times in the selected timezone (for example, Asia/Dhaka) so intervals align with the member’s local workday.
Member Summary & Screenshot Timeline
Summary cards
After selecting a member and date range, summary cards at the top show totals for that period:
Total Hours
All tracked time in the selected range.
Activity
Overall activity percentage for the period.
Active Time
Time counted as actively engaged (keyboard/mouse activity during tracking).
Neutral Time
Tracked time with lower or no activity signals, according to your idle and activity rules.
Screenshot cards by day and hour
Captures are grouped by calendar day, then by hour blocks (for example, 8:00 AM – 9:00 AM). Each card represents one capture interval and shows:
Project & Task
What the member was tracking when the screenshot was taken (for example, Linqor — Bids Management).
Thumbnail
Preview of the screen at that moment. Click to open the full image.
Time interval
Start and end time for that capture window (for example, 08:06 am – 08:16 am).
Activity bar & Active Time
Activity percentage for that interval and how many minutes counted as active (for example, Active Time 10 Minutes).
Capture interval length is set by your admin in Settings (plan-dependent). Cards only appear for periods when the desktop tracker was running on an active time entry.
Notes and actions
Use Notes in the header to add or review notes tied to the member or period where your plan supports it. Members or managers may delete individual screenshots when delete permission is allowed; admins can disable deletion in Settings for compliance.
Tip: For a real-time capture while someone is working right now, use Live Feed → Take Screenshot. Use this Screenshots page to audit historical, interval-based captures.
Tips
- Filter by project and task when investigating a specific client or deliverable.
- Compare Activity and Neutral Time in the summary before reviewing individual cards.
- Match screenshot times to Timesheets if you need to verify billed hours.
Ready to get started?
Create your organization, invite your team, and start tracking in minutes.
Start Free Trial